Showing posts with label Bob Built. Show all posts
Showing posts with label Bob Built. Show all posts
MeePaw Frosts a Cake for Eisley
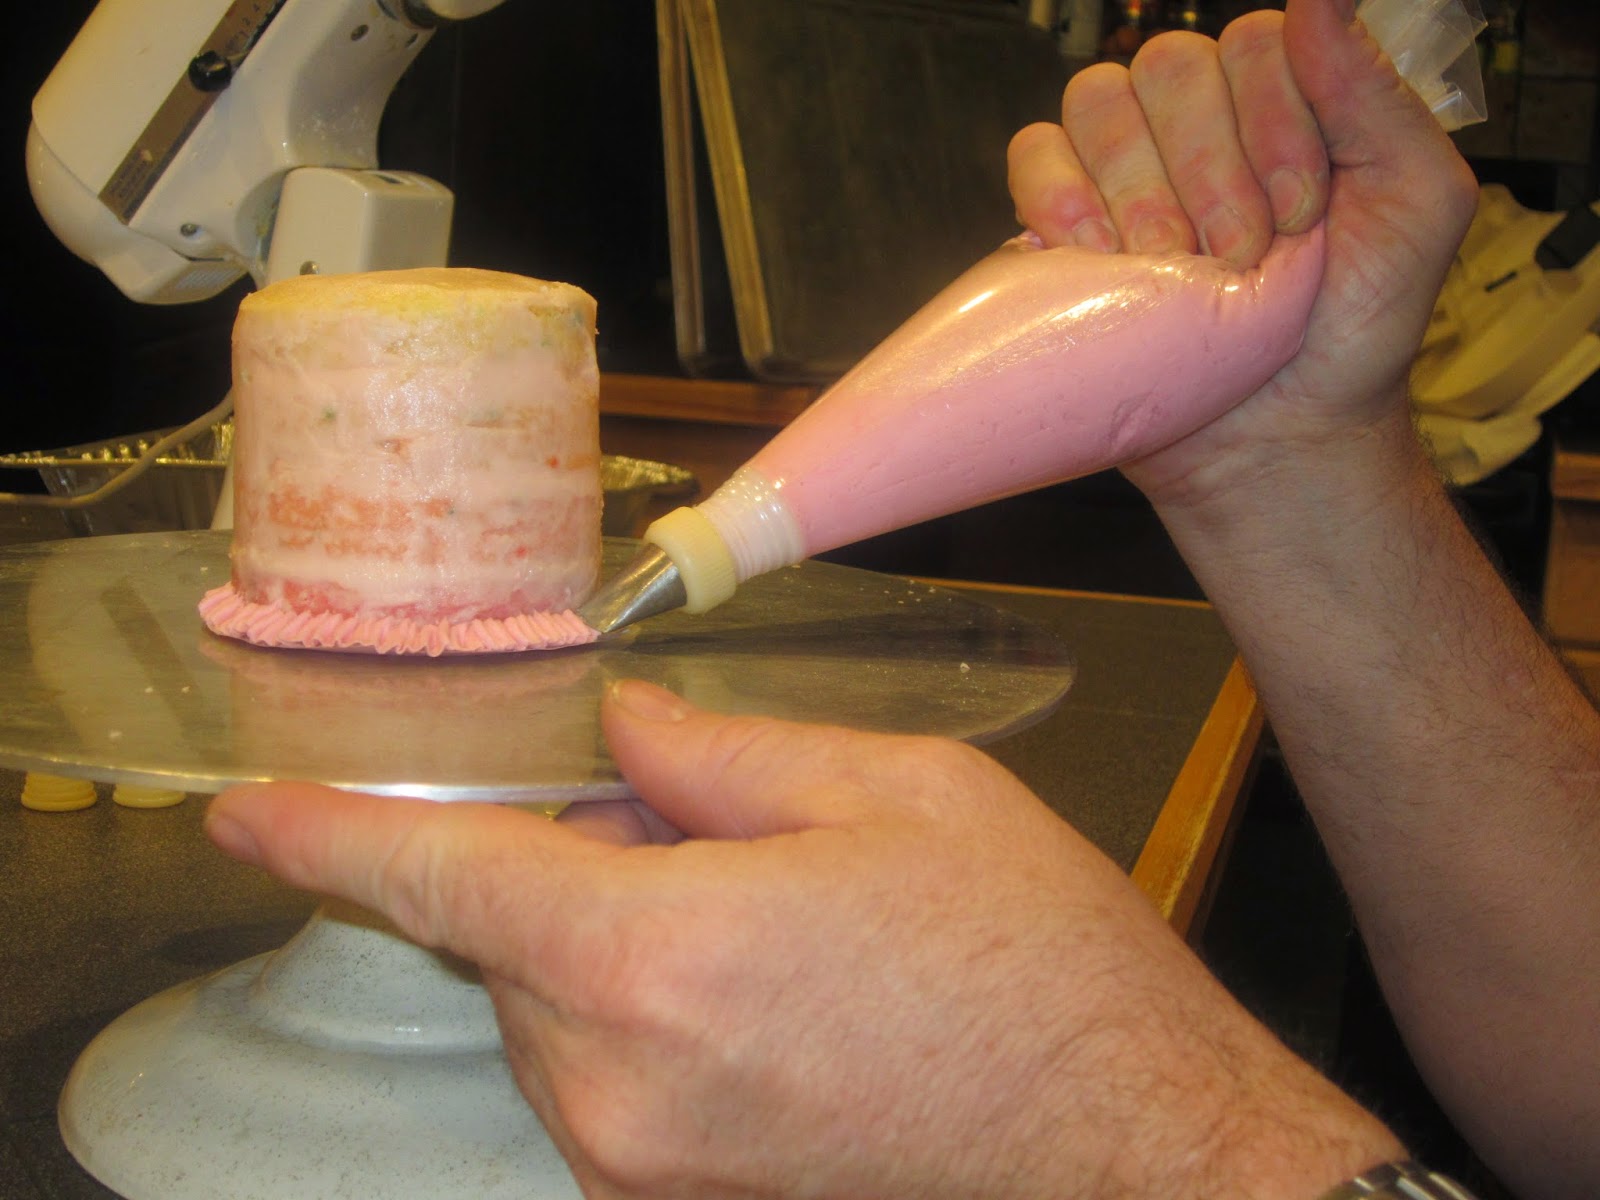
Eisley's parents held her 1st birthday party at our house. Mama and baby came over the day before and Eisley and I played while mama piped frosting on 100 mini cupcakes. They turned out so cute!
She also made a layer cake using canning lids lined with aluminum foil for cake pans. She had loved the cake Bob had made for her reception so at this point sure turned Eisley's first birthday cake over to MeePaw.
Bob used a little different technique since this was such a small cake. Dev wanted an Ombre look so she made three separate piping bags with different shades of pink frosting for Bob to use.
For those of us watching it looked fast and easy.
The finished product was ADORABLE! He did such a great job!
The birthday girl loved it so much she hardly wanted to disturb the frosting J
The love of buttercream frosting won out in the end.
The cake had a yummy surprise when cut into, Dev had make each layer a different color. So cute!
DIY FIre Pit
Note: I have seen our fire pit on other sites linking back to ours. Some sites state that the base is a wooden base. Nope, the cement bowl is really heavy. The base is 4-inch square steel tubing welded and cut to cradle the cement bowl. We bought an ordinary but HUGE steel wok to burn in. The steel has weathered into rusty patina. We have had parties in the summer where we remove the wok, fill the bowl with ice and sodas and plant a solar pathway light in the middle. The fire pit makes a great drink station too!
Love - love - love our fire pit.
When we were laying the patio brick, we decided to make a special place for a fire pit. The idea was that we would make built in benches around the keyhole shaped area with pillars on either side. One pillar would hold a propane tank that we would plumb up through the brick and through the base of the fire pit into the bowl.
We found a cement bowl second at a cement foutain retail outlet and paid very little for it. It was loaded into our van by forklift and unloaded by willing young men with strong backs onto a furniture mover thingy. We found a LARGE wok at a restaurant supply store set it on a few small bricks that sat within the cement bowl. It worked perfectly and we sat around it all the time enjoying the fire and talking about how we would eventually make a permanent base for it.
It sat on the furniture mover for at least 2 years before the platform became weathered and sagged so bad we were afraid it would collapse.
Last year Bob went to work welding a base for our fire pit. He also devised a harness contraption and had the boys lift the heavy monster onto the base. We sometimes still talk about a propane pit but we don't really mind burning wood except on no-burn days which are a bummer.
Wow looking through the pictures for this post made me realize how far the yard has come.
Here is the northeast corner of the yard fall 2009
Almost the same view late June 2012
If you like this post, you may want to read A Thanksgiving pit turkey story with a surprise ending
Harley's Automatic Feeder.
First we created Chika's private and secure dining room but Harley felt left out. It was also hard to go out of town because even though we could put several days of meals in Chika's bowl and she would eat a little each day, Harley had more of my kind of appetite (if there is still food in the bowl I'd better keep eating).
So Bob went to work. The garage view of the set up isn't fancy but unfortunately it's the most organized part of our garage.
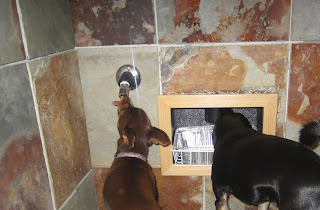
The pink container is water for both of the dogs. The long contraption to the left (PVC pipe, plumbing hardware, cereal dispenser) holds Harley's food.
On the other side of the wall is a little room off of the kitchen. A 3" pipe comes through the wall into a recess under the counter and delivers Harley's food. Do you want to know where Harley is at 5:54am every morning? She is sitting with her eyes on that recess waiting for the food to drop. To the right of the recess is a spigot (actually made for watering pigs). The hose from the water container comes through the wall and is attached to this spigot. The water is gravity fed when the dogs bump their tongues against the spigot.
Chika drinking and Harley eating.
Party Canopy
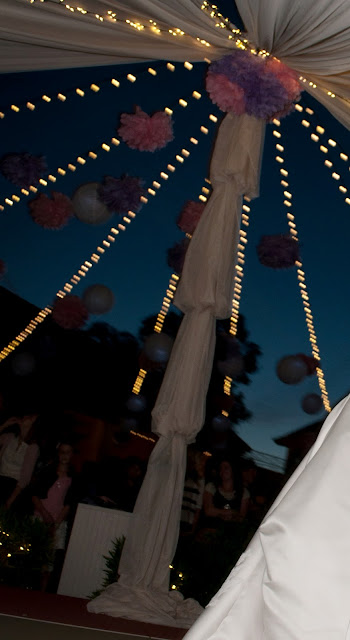
We wanted a wedding canopy to decorate Dev's reception. So Bob got his brain out and thought up this:
 |
| Test set up 2 months before the event. |
The canopy was 1/2 Oval with solid walls and a spoked
ceiling. At the widest it was 70-feet. It had a depth of 40-feet from the
center pole to the back and middle of the oval.
The center pole was a heavy duty light pole and was probably the most important part of the structure.
The canopy is made from pipe and rail. Pipe and rail is
nothing more than EMT electrical conduit (in our case 1" found fairly
inexpensively at Home Depot or Lowes) and canopy fittings (generally found at
army surplus and camping stores or can be ordered online from many places
including www.gvtoolsandtarps.com).
To get the curve, Bob made custom canopy fittings to match
the angles needed. Most standard canopy fittings come in only 90°, 180° and
45°.
The custom fittings were made from a slightly larger diameter chain link fence
pipe (also found at Home Depot or Lowes). He cut, bent and welded it together.
The 7-foot uprights and 10-foot horizontal pieces were EMT
electrical conduit. The "feet" of each upright was a 3-foot EMT
hooked to the upright with a 4 way edge fitting (You can see a picture of this
fitting at www.gvtoolsandtarps.com. Look under "1-inch fittings for flat
top canopy"). Sandbags were placed on each foot. You can call your local
fire department and they will lend you the sand and the sandbags. You will
supply the shovels and sweat.
The fabric was purchased at SAS Fabrics 1111 East Indian
School Road 85014 (there are also SAS Fabrics in Tempe
We cut one long piece of fabric to follow the wall and
attached it at the top rails with PVC clips. These clips were made from 1"
thin walled (200 PSI) PVC pipe. The thin walled part is important because the inner
diameter must be large enough to clip over the 1" EMT. The PVC pipe was
cut into 4-inch to 6-inch pieces. He then created a C shape from the PVC pipe
by making to cuts to the length. You might want to sand these edges so they
don't cut into the fabric when you clip it to the pipe.
Because the fabric was shear we used additional fabric at
each upright, gathered and hanging vertically.
The fabric ceilings spokes were fastened to the walls the
same way and then gathered to the center pole. They were fastened to the pole
with metal macrame rings (Joanns Fabrics and Crafts) and quick links (Home
Depot) . The fabric was attached the macrame rings by running the end of the
fabric through the ring and zip tying it to itself. The pole was dark green so we covered it up by making bishop's sleeves with the fabric down the entire length. No sewing was involved. We just loosely wrapped the fabric around the pole at the top and then, in intervals, zip tied it around the pole leaving poofs of fabric hanging to cover up where we had gathered it with the zip ties. At the bottom we just let it puddle. We hid that crazy looking
mess where the ceiling spokes came together with the tissue paper flowers we made and hung around the reception area.
Camping Showers
I love being married to someone who is so brilliant and creative. Bob designed and built this shower for a campout. I think he said there will be 300 people there. He ordered black landscaping plastic to make the stalls private but we are still waiting for it to arrive. I will update this post with more pictures once he puts the plastic up.
Until then here is what he has so far.
Until then here is what he has so far.
 |
The water is supplied through 1/2 irrigation tubing.
They will have a big water tank to supply the water.
For testing purposes we hooked it up to our emergency
preparedness water tanks.
|
Bob made the pump brackets out of pvc pipe. These really hold the pumps securely. The pumps (which were on sale at Harbor Freight) are attached to the water supply and then to the shower head. 40 pumps will deliver 1 gallon. We had enough plastic to go around one stall. So we ran a little test and this is what we found.
2-3 pumps soak your hair
6 pumps rinse the shampoo out of your hair and wet your body
10 pumps rinse the soap from your body.
Thats a total of 19 pumps which equals only a half a gallon per shower unless someone decides to rinse and repeat.
 |
He made the shower head is adjustable for tall or shorter people. These were made with electrical conduit fittings and PVC fittings. The shower heads came from the 99 Cents only store.
|
 |
Bead Board Garbage Cans
We wanted something other than the generic garbage can last year for our daughter's reception. So Bob made three of these and they fit right in with the rest of the decor. We used them five weeks later for our son's groom's dinner.
Since then we have been glad to lend them to various friends and family members for partys and receptions. We finally sold them on Craigslist. Our youngest son is so happy because he was so tired of loading and unloading them.
Since then we have been glad to lend them to various friends and family members for partys and receptions. We finally sold them on Craigslist. Our youngest son is so happy because he was so tired of loading and unloading them.
 |
| After R's birthday party I finally got a
good clear close-up picture of one of them.
|
 |
This shows the lid off, the box in with a liner. I love that Bob made it easy to change remove trash and change out liners
|
 |
| Bob used a U-Haul box to hold the garbage bags. |
 |
Here is another view with the lid on. The top of the lid is plastic so it has been easy to wipe off any spills.
|
Pull out Trays
 |
| This is the inside of the right cupboard. No shelves very messy and before Bob made the pull out trays the left cupboard looked even worse. The doors pull out and then tuck up above the cupboards. |
 |
| The bottom tray stores glasses and a nice big stack of plates. |
Subscribe to:
Posts (Atom)


